Editing or Deleting Groups / Classes
Once you Add Groups / Classes to your database, you may very easily edit the name and/or code of a Group or Class, rearrange the way you initially Set Up Groups and Classes, and you may delete or inactivate any Group or Class you no longer want in your database.
- From The Initial Portal of Church Windows choose Membership
- Click Groups / Skills in the Button Bar at the top of the screen
- Click Groups
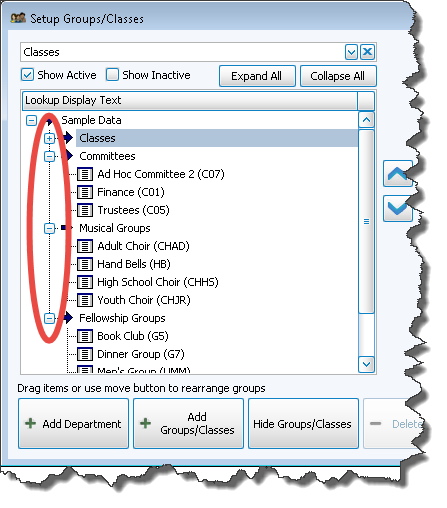
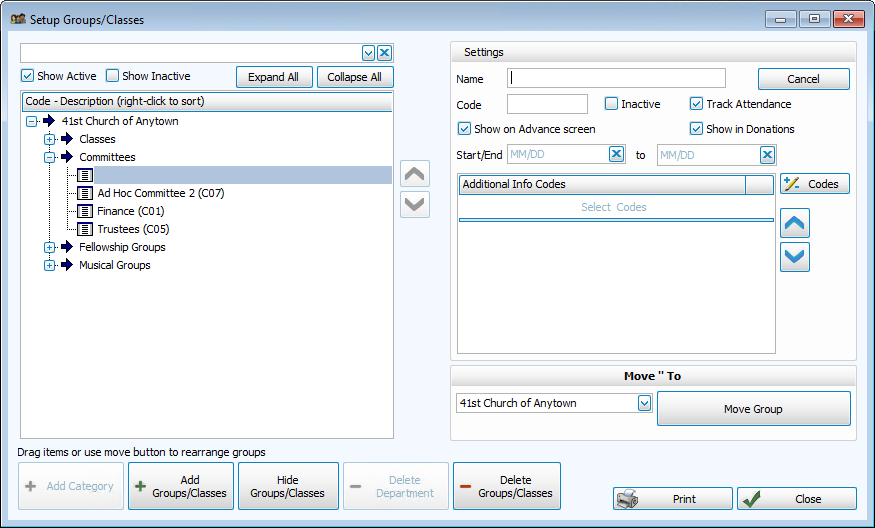
- The Setup Groups / Classes screen opens:
Edit a Group / Class name or code
- Select the Divisions, Departments, and Categories under which that class is listed.
- Click the name of the Group or Class
- Enter the new name or code in the Settings for that Group or Class on the right side of the screen.
- If you wish to edit more Groups or Classes, continue in the same manner.
- When you have finished editing, click Close to close the Setup Groups / Classes dialog box.
There are two ways to rearrange your Groups / Classes:
Drag-and-drop method
- Click the
expand button to the left of each row to view details (when expanded it will become a
collapse button).
- To move a Group / Class to its appropriate spot in the hierarchy, click the Group / Class you need to move, hold the left mouse down, and drag it so that the name is on top of the correct Division, Department or Category. Letting go of the mouse, you will see the name of that class move into position.
- Continue dragging and dropping the Groups / Classes until they are all in their correct Divisions, Departments, and Categories. If all classes have been moved out of a Division, you may rename that Division or delete it.
- When you are satisfied with your arrangement of Groups / Classes, click Save. Or to discard changes, click Close.
OR
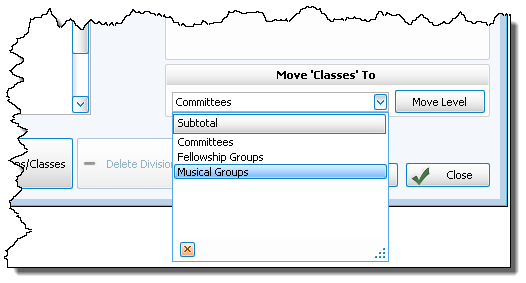
"Move To" dropdown
- Select the Group / Class you want to move. If you are looking for a particular Group / Class, enter the name of that Group / Class in the box at the top of the screen.
- Use the "Move Group / Class To" dropdown in the bottom right to choose a different location for that Group / Class:
- Continue selecting and moving the Groups / Classes until they are all in their correct Division, Department and/or Category. If all Groups / Classes have been moved out of a Division, you may rename that Division or delete it.
- When you are satisfied with your arrangement of Groups / Classes, click Save. Or to discard changes, click Close.
Note the difference:
If you delete a group for which attendance has been recorded, those attendance records will also be deleted since that group will no longer exist. Consider simply marking the Group / Class as inactive to maintain the history.
- Select the Divisions, Departments, and Categories under which that class is listed.
- Click the name of the class you want to delete.
- Then click — Delete Groups / Classes button.
- If no one is enrolled in the Group / Class, a confirmation screen will appear. Click Yes to delete the Group / Class; click No to cancel the deletion.
- If people are enrolled in the Group / Class, a warning box will appear telling you how many records that Group / Class will be removed from; it will ask if you still want to delete it. Answer Yes to continue, or No to cancel the deletion.
- If you answer Yes, then the group will be permanently removed. If you click No on this message, then the group will NOT be deleted.
- Click Close to close the Set Up Groups and Classes screen